The Struggle with Augmented Reality and Complex Models
Augmented reality can be an incredibly mind-bending technology that takes you to entirely new worlds, makes the invisible visible, and simplifies your everyday live. The impossible can become reality when, for example, sculptures defy the limits of physics, hover and dance around the viewer. Users are inspired in a whole new way and encouraged to interact. But the way to get there is sometimes not as inspiring as the experience itself. Creators for augmented reality not only have to take care of a harmonious conception, appealing user experience and great designs. Often, a large part of the time spent on the project is devoted to troubleshooting and fixing bugs instead of the creative part. One potential weakness of augmented reality apps and platforms are their current technical limitations. AR requires processing power, meaning CPU and GPU performance. This starts with the rendering and tracking engines of the operating system, the internet speed, the camera and the battery life. All these systems can be stretched to the limit with AR. If the conditions are not sufficient, the experience stutters and stumbles, frames are not rendered smoothly and, in the worst case, the application even crashes. To avoid such horrific scenarios, there are some tricks to relieve the processors and computing capacities. The creator can contribute significantly to a stable and smooth user experience. The key word here is ‘complexity’. The complexity determines how many frames of your experience can be displayed with a consistent rate, and how smoothly the overall scene is running. Complexity contributors are high resolution textures, high polygon counts and complex scenes that cause many draw calls for different objects. All this is also reflected in the file size, which is a good indication of the complexity of a model. It's no coincidence that almost all platforms limit the upload size for assets. Web AR platforms like 8th Wall recommend not exceeding 10 MB for one experience. While Spark AR and Lens Studio offer 4 MB for the complete experience, Scavengar provides 20 MB per asset (!) and has no hard limitation on how big your AR experience can be. That being said, please have in mind, the smaller the whole experience is, the better the performance. In addition, from a UX perspective, you don’t want to keep your viewer/users waiting to download your experience, draining their data plan. As a rule of thumb, keep it as small as possible. This requires knowledge of how a 3D model is structured. A 3D model normally consists of a basic framework, the mesh, which is assembled from vertices, edges and faces. The vertices are connected with lines and at least three vertices form a face – also called polygon. The more polygons an asset contains, the more polygon coordinates must be stored. Usually, a 3D model consists not only of a few hundred, but of thousands of polygons. This can quickly add up to half a million polygons if the model becomes more complex. However, this is usually already too much for Augmented Reality. Therefore it is recommended to reduce the amount of polygons, also called the polycount. Here it is important to find a healthy balance between the complexity of the asset and a small number of polygons while maintaining the highest-possible visual fidelity. In 3D software like Blender there are several ways to reduce the number of vertices. A reliable method is the 'Decimate' modifier. With the decimate modifier you can adjust the number of polygons the asset should consist of. Here you can reduce your models complexity as far as a good optical representation allows. When you are satisfied you have to apply the modifier to transfer it into geometry. Check out the first part of our AR QuickTip Tutorial about the decimate modifier right here. You could also have a look at Draco Mesh Compression, which helps you compress the mesh of your GLTFs but will only work if the rendering-engine you are displaying your AR-content with supports it. Pro Tip: Vectary is a free, browser-based 3D tool that allows you to create 3D models quickly and easily. Besides the usual editing methods, there are also some modifiers to choose from, like the subdivision modifier that splits the faces of a mesh into smaller faces, giving it a smooth appearance. But wait, didn't we just want to reduce complexity?! Yes. But... modifiers like the subdivider don't need to be converted to geometry in Vectary to work in USDZ. So your polygon count doesn't increase, yet you have more complexity. Awesome, isn't it? Pro Tip: Do you prefer to stay in Blender or Cinema? No worries, we hear you. Here are some more insider hints to reduce complexity. Pro Tip: Speaking of textures; another potential culprit that has a significant impact on size are the materials and textures that give your model its unique appearance. Large assets can sometimes produce fairly large images. A file format that is often created by default when baking textures is the PNG format. The advantage is its lossless compression, which can be a disadvantage at the same time. But how do I know if my textures are PNGs or JPGs? Easy, open your GLB, FBX or USDZ in Apple's Reality Converter. We need to do this for GLBs or FBXs anyway to convert them to USDZs. Open the Material window and click on your texture. At the bottom you can see if it is a PNG. Pro Tip: If the USDZ is still too big, here is another potential tweak. Open the model in Apple's Reality Converter and open the textures with a right click in Preview. Via 'tools' you can select the 'adjust size...'. If your texture is larger than 1024 x 1024 px you can confidently reduce it to this size. For monochrome or less detailed textures you can also select smaller dimensions. However, it’s important to keep an eye on negative optical changes in your model when replacing the texture with the new one in Reality Converter. Replace the texture by selecting the corresponding original texture in reality converter, deleting it and importing the newly created one. Pro Tip: If you apply some (or all) of these steps to your asset, it is likey your model will be sufficiently small to perform smoothly in augmented reality applications. Please have in mind there’s no one-size fits all-solution. It always depends on the complexity and initial size of your model, but these guidelines and tips might be a good way to drastically reduce your assets size and complexity. As a rule of thumb, 5 MB to 10 MB should run well and cleanly if you are designing for newer devices. If you want to provide a good user experience for older mobile devices too, you should try to provide smaller file sizes. Lastly, there’s only one thing left to do (probably the most important one)But where do the datasets of a 3D asset actually come from?
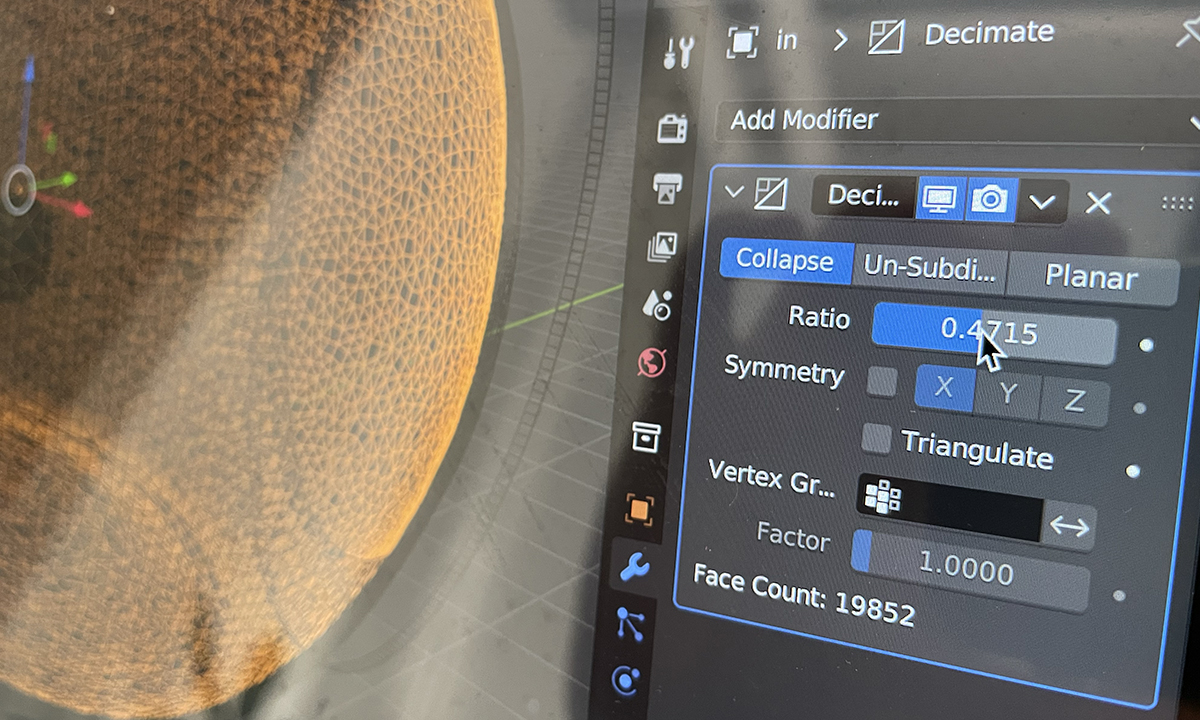
Decimate Polygons of your 3D Model
Decimate the polygons step by step and apply the modifier at intermediate steps. This way, the already decimated geometry is taken as a reference for further reductions and there are fewer rough imperfections.Consider working with the online tool vectary.com.
Another goodie; you can export USDZs directly from Vectary! All in One.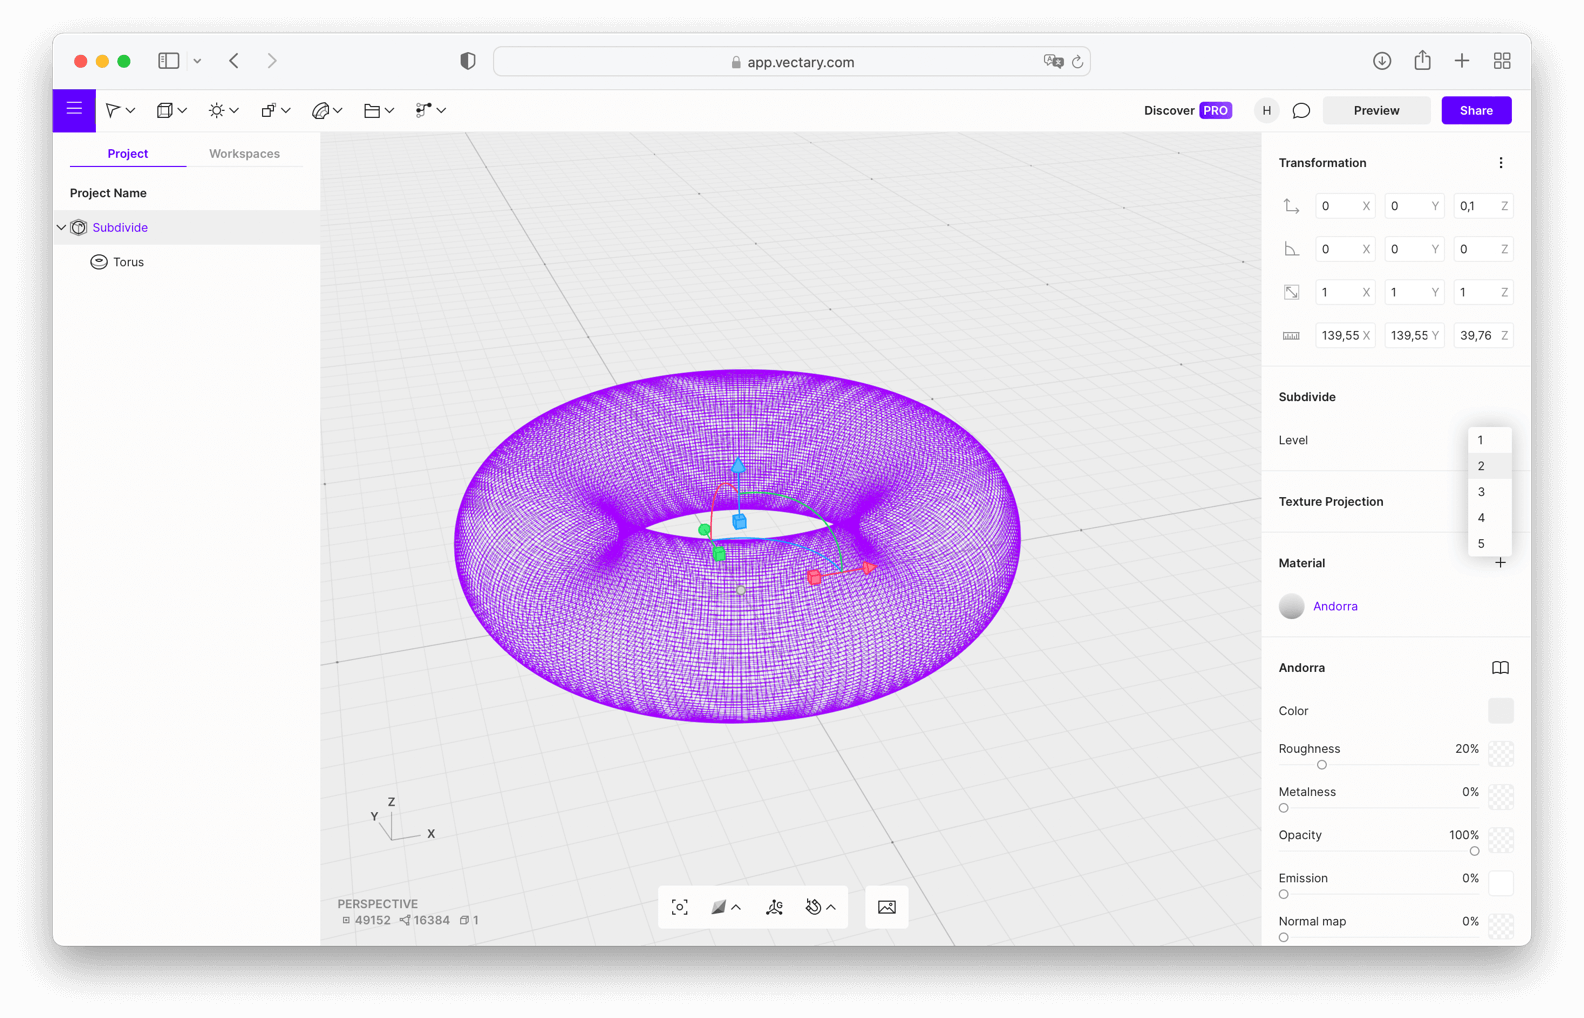
Bake Geometry in Normal Map
Do you have a very complex mesh with small details that you want to be visible? It might be a good idea to display small geometry like buttons or switches only as the texture, i.e. the image that forms your material, instead of having it as geometry. This can save you a ton of polygons. Check out this awesome tutorial by Jayanam on how to bake normal maps in Blender.
Convert detailed geometry into a texture - keyword normal map baking.Convert Textures from PNG to JPG
As the name intends, the pixel data is saved lossless, i.e. with little or no compression. This results in, you guessed it, file sizes that don't really help us with augmented reality. If no transparencies are required, compressed JPGs are sufficient in most cases to achieve the same visual quality.
When exporting to USDZ you can simply select ‘Compressed’ and Reality Converter will automatically save your textures in USDZ as JPGs.
You will be surprised how much file size can be saved here.
When exporting from Apple's Reality Converter, select 'Compressed' to shrink the USDZ with JPG textures.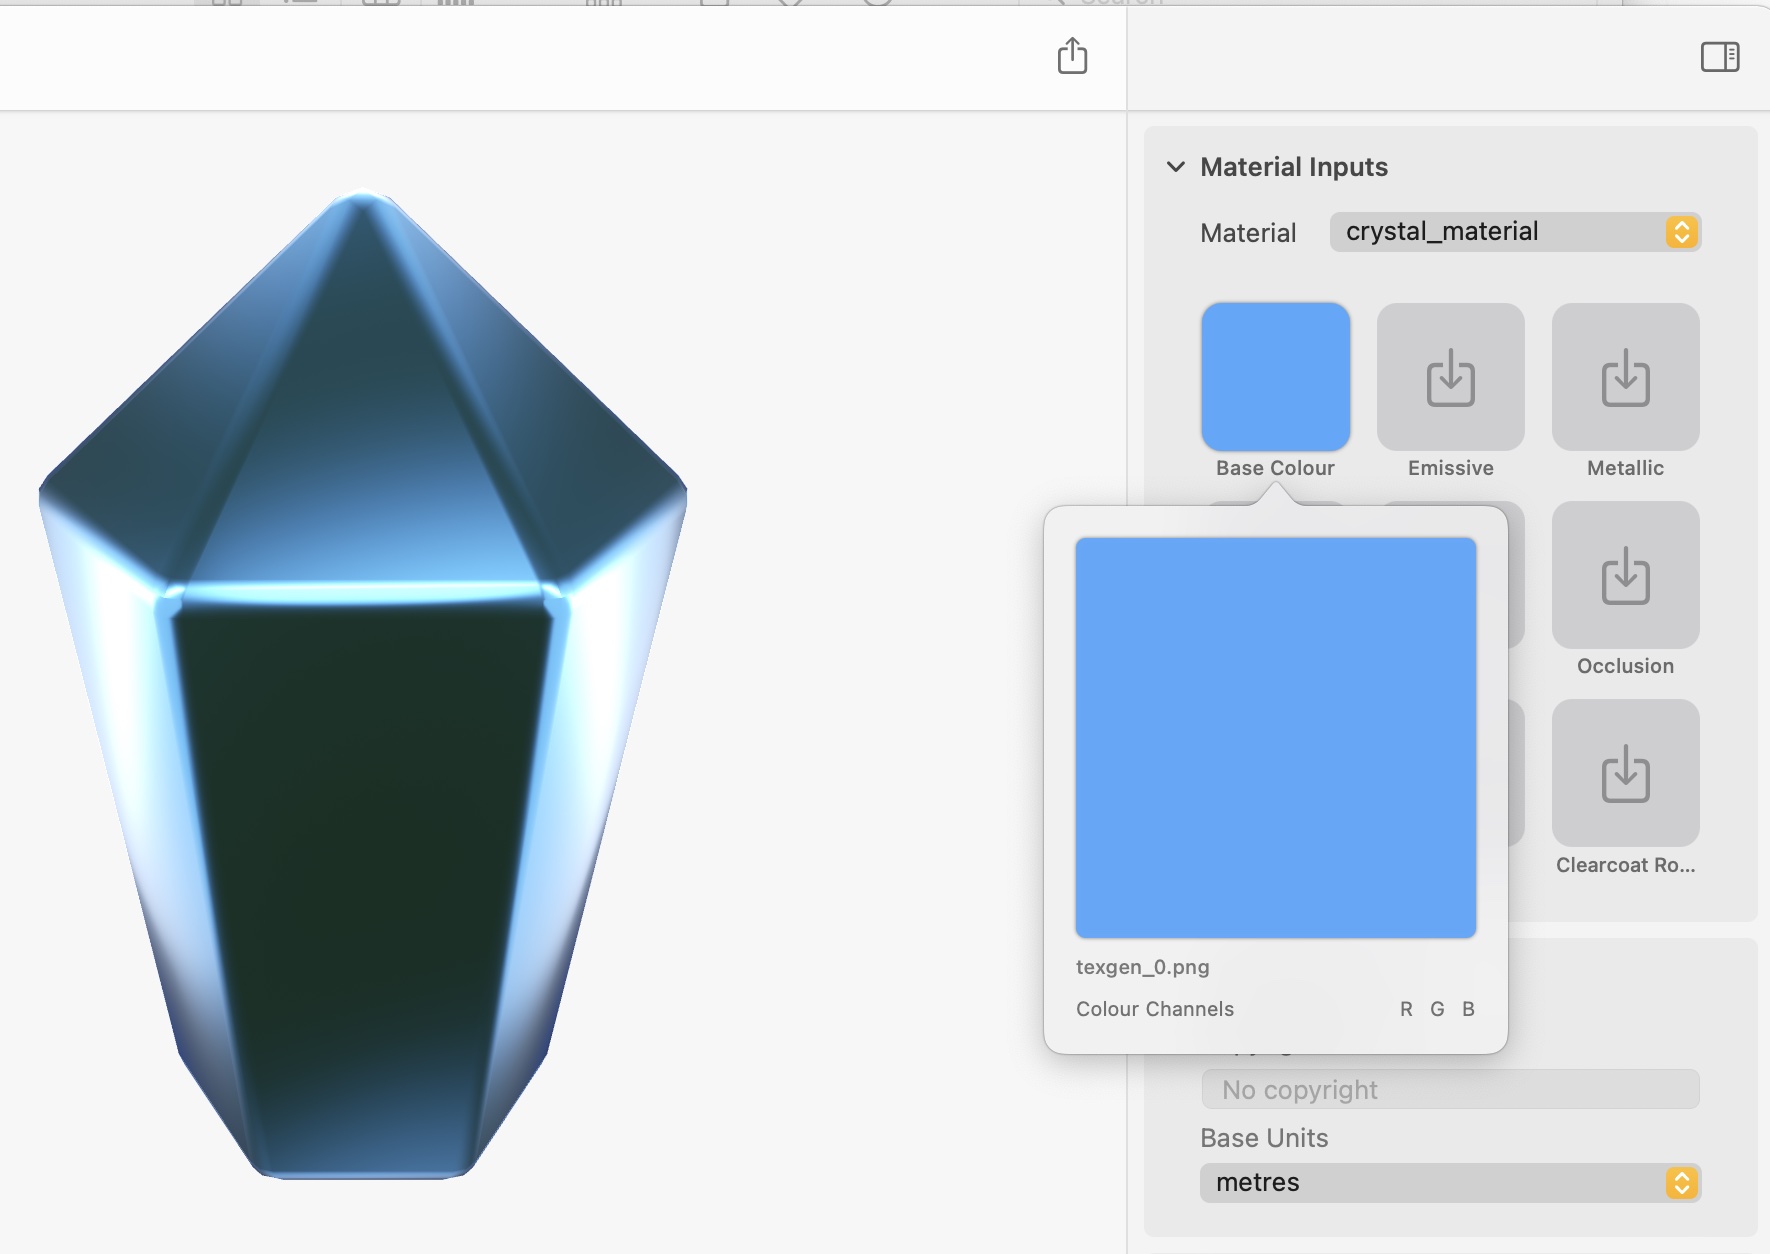
Reduce Texture Dimension
Check and reduce the dimensions of your texture in Preview. 1024 x 1024 px is sufficient in most cases.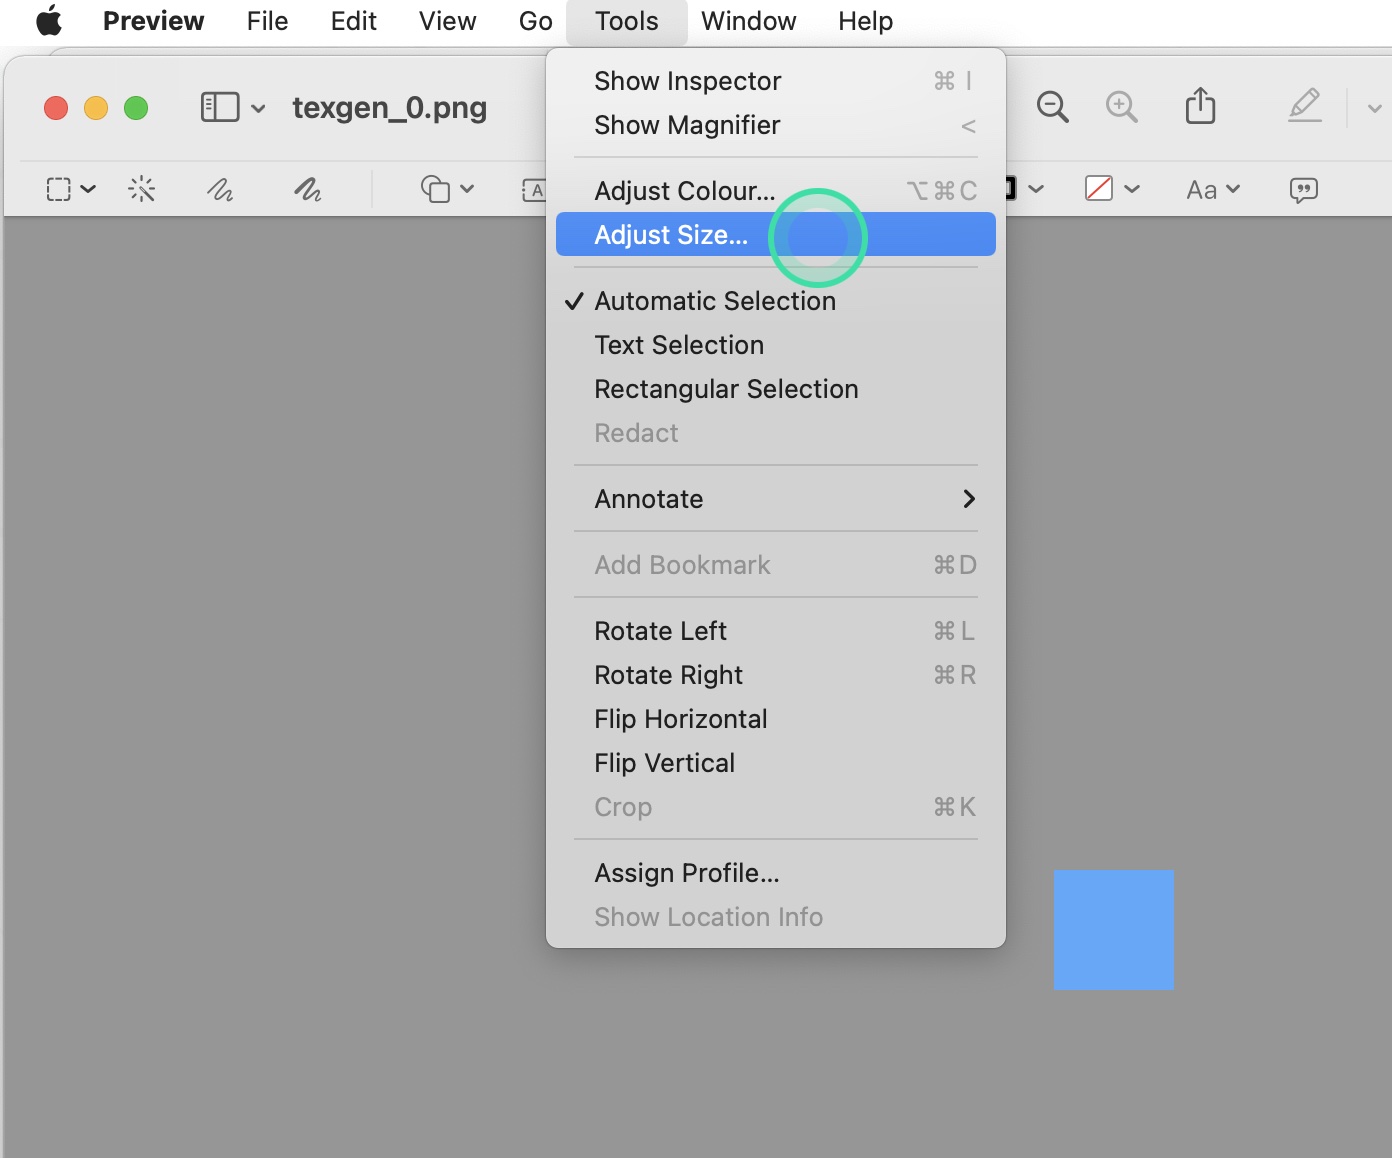
And That's it!
Drop that asset into Scavengar to turn your hard work into an amazing, interactive, and multi-sensory AR experience.
-
 Henriette Gressler
-
 Marc Wicht
-
 Arthur Schiller